Record skype audio video calls

Record skype audio video calls

 Free tool for recording not only video calls but also audio Skype calls in high quality. The program has a convenient and intuitive interface with support for International languages. You can record not only interlocutor, but also themselves.

You can’t record skype audio video calls directly on skype but can record skype audio video calls by an external software that is installed on your PC computer. So know here that how to install “Pitfalls software” on Your computer to record skype audio video calls.

Installation

The installation process is simple and standard, but just in case, we’ll take you through some of the “Skype Call Recorder“.
1.   Run the downloaded file in the first two windows installation wizard click “Next” button.
2.   If set the default program to disk “C” in the directory “Program Files“, and then in the next window, press “Next“. Otherwise, specify a different location by clicking the “Browse” button.
3.   In our case, a new window to abandon the browser Orbitium, choose “Custom Installation” and remove all ticks. Then click “Next“.  
4.   In the next window, read and see that we now turn to the “begging” 3rd party utility, remove the check mark and click “Next“.
5.   Then, at its discretion, decide to have or keep ticks away, because These settings relate to the program already. And completes the installation.

Record Audio video calls

Launching an application accompanied by a warning that in civilized countries accepted warn interlocutor, if you record a conversation with him. Tick ​​”Don’t show again” and Continue.Skype call recorder
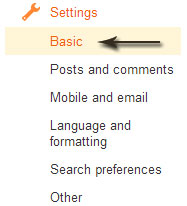
By default, the program works in the English interface. To change the language of the domestic press in the top menu “Tools“, select “Languages” and specify your language.
That’s all, the program is ready to work. To open the program settings, click on the top menu “Tools” and select “Options“.
Here you can manually specify the desired settings video and audio quality. If you do not understand this, then leave all the default “auto“.
a.  The location of my video allows you to select the location of your video on the screen, if you select the recording mode both of them in the main window.
b.  If tick “auto recording“, then record video calls will be made automatically.
Recording mode is selected in the main working window. The program allows you to:
 ->  Record all interlocutors.
 ->  Record only interlocutor.
 ->  Record audio only.

You can change the location in which to store recorded video and audio files of conversations, for this select the desired path by clicking “Browse”.
Oh, and then it’s simple. Contact with someone in Skype, and to start record skype audio video calls, press the red icon.

Fast shutdown windows XP

 Fast shutdown windows XP

When you shutdown you PC or computer lots of programs are still in “Running process” and they are not closed properly. Due to which your computer take too much time to shutdown but you can shutdown your computer fast with this simple tip.
1. First of all open “Note pad“.
2. Now write “Shutdown” in Note pad and save file as “shutdown.reg“.
3. Now go on that location where you save your “Shutdown.reg” file.
4. Double click on file and “Import” it to windows directory. Your computer will shutdown faster.

Disable Unwanted StartUp Program

دوستو یہ ٹپ بہت کام کی ہے جو میں آپ سے شئیر کررہا ہوں اس کے بعد آپ کے سسٹم کی سپیڈ میں اضافہ ہو گا
اکثرآپ کا واسطہ ان پروگرامز سے پڑا ہو گا جو کمپیوٹر کےآن ہوتے ہی خود بخود کھل جاتے ہیں۔میرااشارہ یاہو مسنجر ،ڈاونلوڈ منیجر،مائیکروسافٹ آفس،کویک پلیر،اینٹی وائرس ،ایڈ ویر اور سپائی ویر سافٹ ویر کی طرف ہے۔جو خود بخود کھل جاتے ہیں۔آپ کی اجازت کے بغیر اور سسٹم کی سٹارٹ اپ سپیڈ کم کر دیتے ہیں۔اور ونڈودیر سے کھلتی اور آپ کو بہت سارا انتظار کر پڑتا ہے۔اسکے لیے ایک ٹپ ہے۔جس کو استعمال کر کے آپ تیزی سی لاگ ان ہو سکتے ہیں۔
سارے پروسس کے سٹیپ یہ ہیں۔
start .....run(write msconfig)....startup....(unchecking process)
آپ جلدی سی رن کھولیں۔رن کھولنےکیلئے سٹارٹ پر کلک کریں۔اور اس میں
msconfig
لکھیں۔پھر سٹارٹ اپ پھر جائیں اور جو پروگرام آپ چاہتے ہیں۔کہ سٹارپ اپ کے دوران نہ کھلے انھیں ان چیک کریں۔اب آپ کا مسلئہ حل ہو جائے گا۔میرا آپ کو ایک مشورہ ہے کہ اینٹی وائرس اور سپائی ویر اور دوسرے اہم پروگرام کو ان چیک نہ کریں۔


  1. Click "Start" in the left bottom corner of the screen; click "Run" (look in the start menu, near the bottom right of the start menu). 
  2.  2.Type "msconfig" and then press "Enter.
  3. Select the "Startup" tab (most likely the second tab from the right).
  4.  Decide what programs from the System Configuration Utility screen you would like to keep running automatically every time your computer starts.
    • It is likely that this list contains a number of programs you may not have even realized were running on your computer during startup, or even at all. Over time many computer users download programs that may have been used infrequently or not at all, but that may have been opened during startup for some time without the user realizing it.
    • It is important to note that removing these programs from the startup menu is not the same as removing the programs all together. Programs from this list that are unselected can still be opened and used on your computer but will simply not automatically run when your computer starts.
    • It is also possible that unless you configured your entire computer yourself (unlikely except for the most knowledgeable computer users) your computer came with a variety of programs of which you have little to no knowledge pre-installed and likely running during startup.
  5.  Click on "Disable All" in the bottom right corner of the System Configuration Utility screen to prevent every program on the list from running during startup.

    • This action should be taken with great caution, as the list likely contains at least a few programs that should almost always be running on your computer, such as anti-virus software, or programs you know you use all the time, such as instant messaging services.
    • Taking the steps above will allow you to prevent programs from running every time your computer starts. When your computer is running you can also easily stop these programs from running only for your currently computing session. Programs that are currently running are shown on the taskbar on the bottom right of your screen (you may have to click an arrow pointing to the left in order to show all of them). Right clicking on any of these programs will allow you to close or exit those that do not need to be running at the moment.

Copy And Paste a File

دوستو آج میں آپ کو فائل اینڈ فولڈر کاپی کرنے کا نہایت آسان طریقہ بتاوں گا جب ہمیں کوئی فائل یا فولڈر کاپی کرنی ہوتو پہلے ہم اسے کاپی کرتے ہیں پھر اسے مطلوبہ جگہ پر جا کر پیسٹ کر تے ہیں اس میں وقت بھی لگتا ہے اور مطلوبہ جگہ تلاش کرنے میں پھر فولڈر بنانے میں کافی جھنجٹ معلوم ہوتا ہے آپ یہ دی ہوئی رجسٹری فائل اپنے سسٹم میں انسٹال کریں پھر جہاں چاہیں سپیڈ سے اپنے فائل اور فولڈر کو موو کریں اس کو انسٹال کرنے کے بعد آپ جس کسی فائل اور فولڈر پر رائٹ کلک کریں گے اس میں دو آپشن آ جائں گے COPY TO FOLDER MOVE TO FOLDER ان میں سے آپ نے جو بھی ایکشن کرنا ہو سلیکٹ کریں اور اپلائی کریں

  1. Another way to copy and paste files is to use the keyboard shortcuts Ctrl+C (Copy) and Ctrl+V (Paste).
  2. You can also press and hold the right-mouse button and then drag the file to the new location. When you release the mouse button, click Copy here.
  3. You can copy and paste a folder the same way you would a file.

Make Your Usb Bootable

Create Bootable USB Drive

  1. Start PowerISO (v4.8 or newer version, download here).
  2. Insert the USB drive you intend to boot from.
  3. Choose the menu "Tools > Create Bootable USB Drive". The "Create Bootable USB Drive" dialog will popup. If you are using Windows Vista or Windows 7 / 8 operating system, you need confirm the UAC dialog to continue.
  4. In "Create Bootable USB Drive" dialog, click "..." button to open the iso file of Windows 7 or Windows 8.
  5. Select the correct USB drive from the "Destination USB Drive" list if multiple USB drives are connected to the computer.
  6. Choose the proper writing method. "USB-HDD" is recommended.
  7. Click "Start" button to start creating windows 7 / 8 bootable USB drive.

If no errors occurred in the above process, you should now be all set to setup Windows 7 / 8 from USB drive!


Step 2: Configuring the BIOS:

You should now reboot and go into the BIOS configuration to boot from USB. Instructions for doing so wildly from system to system, but generally entail the following:

  1. Reboot the system.
  2. While booting (before Windows starts loading), get into the BIOS configuration screen by hitting something like F1, F2, Delete or Escape. Hotkey instructions are generally provided on the screen.
  3. Go to the section that contains your boot devices.
  4. With your USB drive plugged in, the USB drive should be listed. If it isn’t, your system might not support booting from USB. Assuming that it is supported (as is the case with virtually all modern hardware), promote your USB drive to the primary boot device.
  5. Exit from the BIOS configuration, saving all changes.

If you’re completely new to BIOS configuration, BIOS for Beginners over at Tom’s Hardware might be a good primer. Be aware though, that you can seriously screw up your system by providing incorrect settings!


Step 3: Booting and setup windows 7 / Windows 8 from USB drive:

Assuming that you properly configured your BIOS and your USB drive supports booting,  Windows 7 / 8 setup should now load. Depending on the speed of your USB drive, this may take a while.

If it isn’t working, then double-check the following before making a scene:

  • Is your BIOS properly configured for booting from the USB device? (Is the USB device listed and does it have top priority?)
  • Have you correctly prepared the USB drive in step one? (Restart the procedure.)
  • Does your USB drive properly support being booted from? (Try another one!)


Disable Right Mouse Button On Your Website Or Blog

You decide to share your knowledge and experiences in a blog, and you invade the doubt whether or not you should protect the contents against plagiarism, which is quite common in the network.
After researching a bit, you realize that you can disable right mouse button, to thwart the attempts of those who do not hesitate to copy what you worked so hard to write, or those images that dedicate so much work and effort.
But is it the best option to disable the right mouse button to prevent copying your content? Reflect a bit on this.

Why NOT do?


It is limiting, and can be annoying, disturbing, even insulting
Not all users of your blog will be thinking about copying your content, and among them, surely users will constantly use all the options that come with the browser via the right mouse button.
By disabling this feature, users will be unable to use these options and worse, might be upset by such a drastic decision you made, even, might stop visiting your blog.

It is useless
Copy content from your blog is not the only way to get your content. For example, you can copy it from their mailboxes, if for example you facilitate your users subscribing to the blog via email, unless you changed the option, and your subscribers do not receive the full post.

It is not a magic bullet
In addition, the commonly used method is not foolproof, because some research, anyone know it is possible to enable the right mouse button again, following a few simple steps.
Consider this: in the end, any user who is determined to copy your content will still put thousands of obstacles.

And what if I just disable the right mouse button to not copy images?
In the case of images, the user can make a screenshot and holy remedy, however the image will be.
I think if you want to protect images, whether for example because they are sold, should be published in a smaller than the original size, and lower quality, well marked images (putting up the name or logo creator), which making pages that are involved in selling online images.
We can certainly use more friendly alternatives when both users of our site attempts to protect images without affecting, being clear to the terms of use that can be given to these and generally to all your content.

And what if someone copies my content?
As a blogger, you can report any breach of copyright by completing this form, I can assure you that if you take action on the matter, although before, do not discard the possibility to contact the site administrator is using your content without prior authorization, thereby, may not need to take more drastic measures.
Like Us On Facebook And Subscribe Us And Get Latest Tricks & Tips By Paki Learner.

Make Private Blog in Blogger

 
 Blogs created on blogger are by default open for all readers so that they can come and read any blog according to their choice. But sometime we need to make our blog private so that nobody can read it without our permission like in case of private blog where we share our family photos for family members only or a blog for friends so that only they can read that blog. The reason can be different for different bloggers to make their blogger blog private and restricted for specific readers.
Blogger provides a weird tool by which we can easily restrict our blog for public readers. They will not be able to access our site. Only blog admins and authors can access the blog if they are log in to their Google account. Let's start the tutorial.

Make Private Blog in Blogger

Log in to Blogger and go to Settings >> Basics >> Blog readers.

blogger basic settings

Under the blog readers section click on edit link where you will find below three options.

  1. Anybody: This option is selected by default means your blog is open for public readers. Anyone can access your blog.

  2. Only Blog Authors: If you choose this option then your blog will become restricted for public users. Only blog admin and blog authors can read the blog. But they have to log in to their Google Account to access the blog.

  3. Only These Readers: This is the last option which provides the facility to open your blog for particular readers. You can enter the list of their email ids so that they can receive an invitation to become your blog readers.
Choose any one from these three options and click on "Save changes" button.
Get The Video Of This Tutorial By Clicking Here...!
Like Us on Facebook & Subscibe Us And Get Latest Tricks & Tips By PAKI LEARNER.

Contributors

Advertisment